The web interface is the non-programmer's primary point-of-contact with the Geochron API. Many kinds of custom layers can be created without a lot of programming - and if you're willing to pick up a bit of code, you can do a lot more!
Static, non-changing layers are very easy with just the web interface. If you have data you need updated regularly, you'll have to delve into more advanced functionality and interact with our JSON REST API.
Layers
Layers are what you'll be creating in the Geochron API to be sent to your device. They contain the data you'd like to place on top of the Geochron map.
Layers are comprised of multiple "components", which come in various forms and can be combined to create sophisticated visualizations.
For a full description of each type of Component, please see Layer Components for details.
Layer List
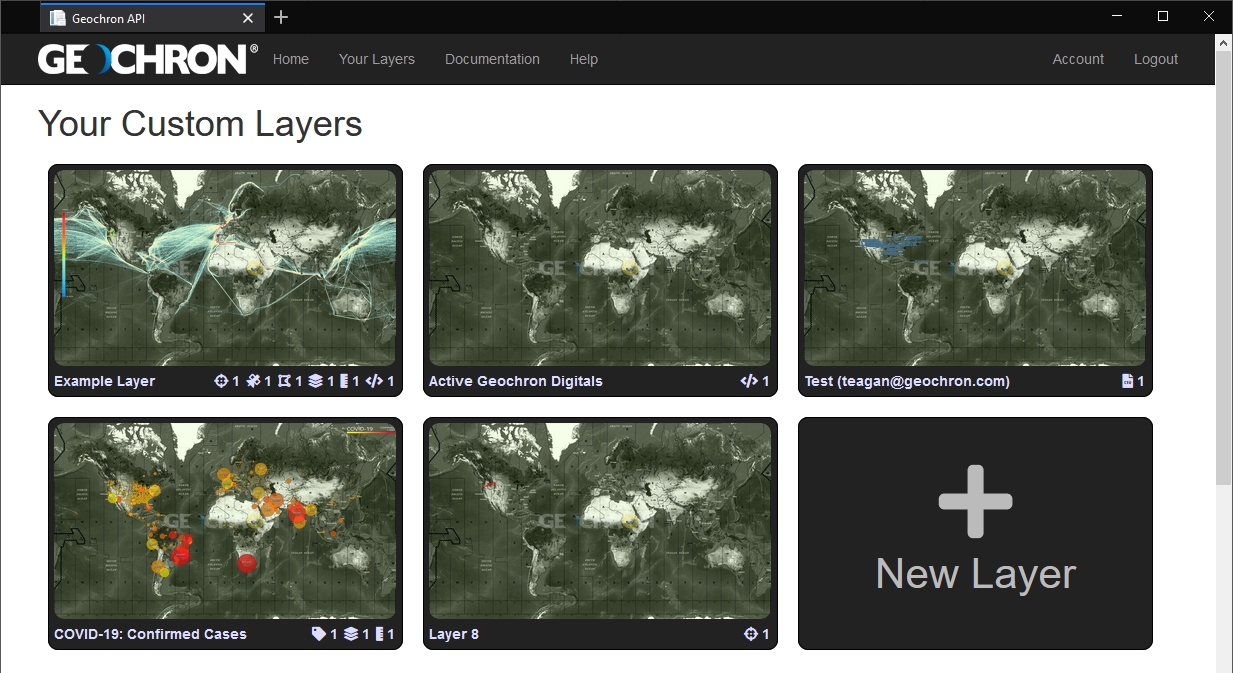
The layer listing will display all your custom layers available for editing. It will also allow you to view the preview of any layers that are currently sent your Geochron Digital.
A New Layer button allows you to create an entirely new custom layer.
Layer Viewer
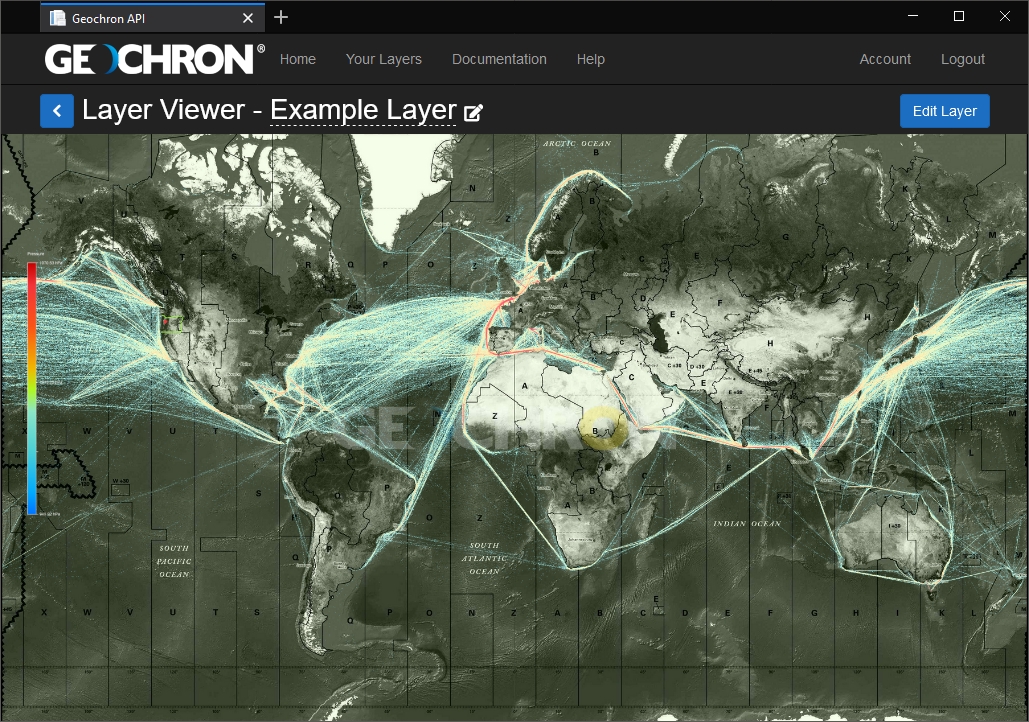
The layer viewer allows you to preview what most custom layers will look like once sent to the Geochron Digital. A basic mapset is used to display your custom overlays, points, paths, and more on top of so you can design quickly, without waiting for the layer to get sent to your Geochron Digital for testing.
Layer Editor
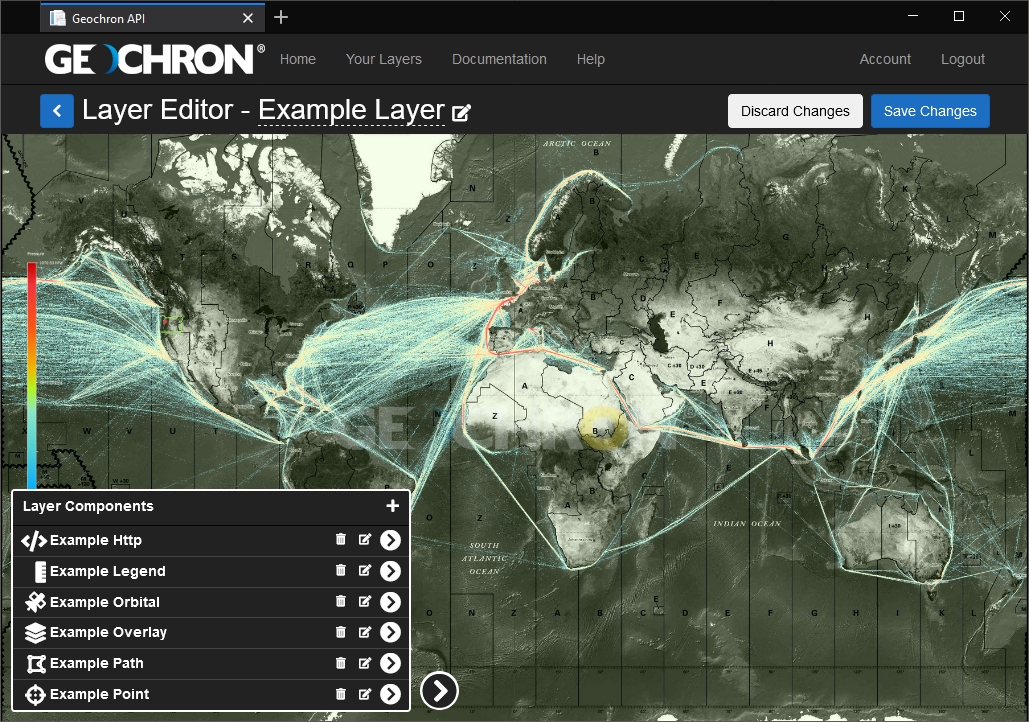
The layer editor is where you'll be doing most of your work on your layers. If you don't see an Edit Layer button, you probably don't have permission to edit the layer you're looking at.
The layer editor is comprised of the layer preview, as with the layer viewer above, and a list of layer components. If you've just created a new layer, this list will be empty, and you'll need to add a new layer component.
As you edit your components, the layer preview will update automatically for all preview-enabled components. Once you are done making your edits, you must press the Save Changes button, or they will be automatically discarded and not sent to your Geochron Digital when you navigate away or close your browser.
Add Components
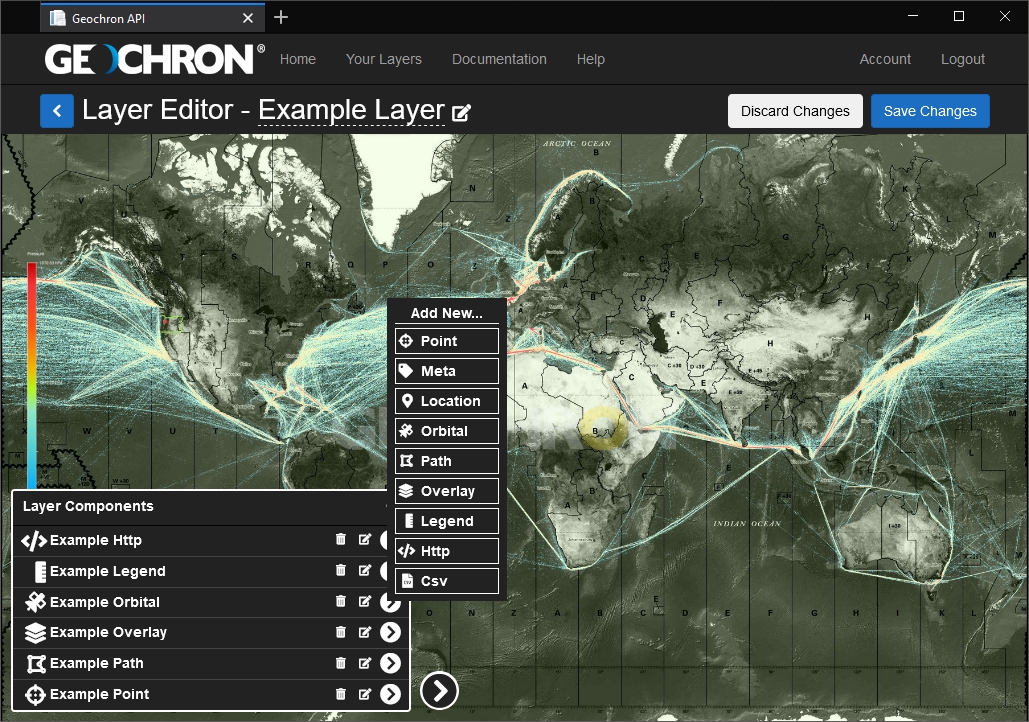
A small plus ("+") button is present on the component list. Hovering over this button will reveal a small menu of buttons, which allow you to add a new instance of each type of component currently available.
For more information on the function of each of these component types, please see the detailed documentation on Layer Components.
Edit Components
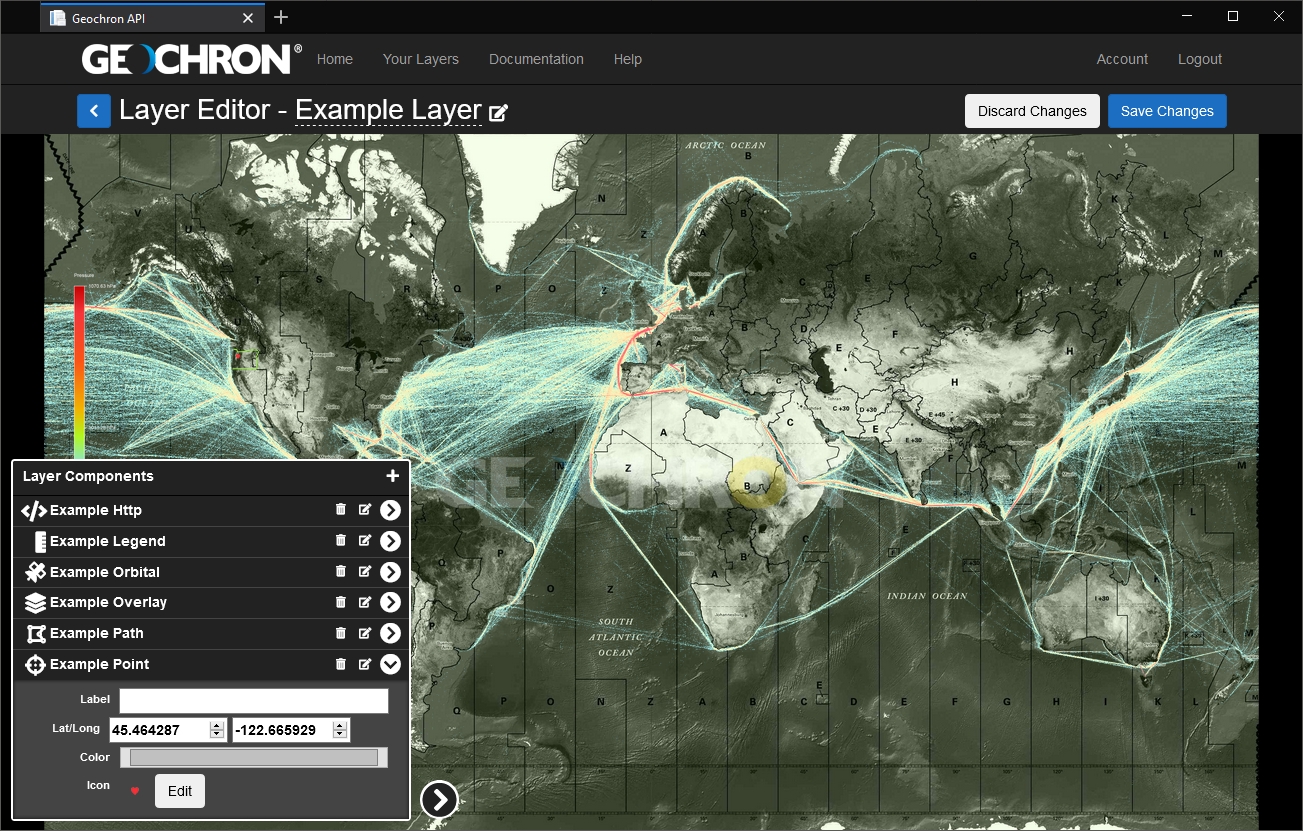
You can edit the properties of existing components by clicking on their name, or the arrow to the right of their name, to expand their configuration area.
Once expanded, each component type has its own configuration properties. For more information on which each of these properties does for each component type, please see the detailed documentation on Layer Components.
Moving Component List
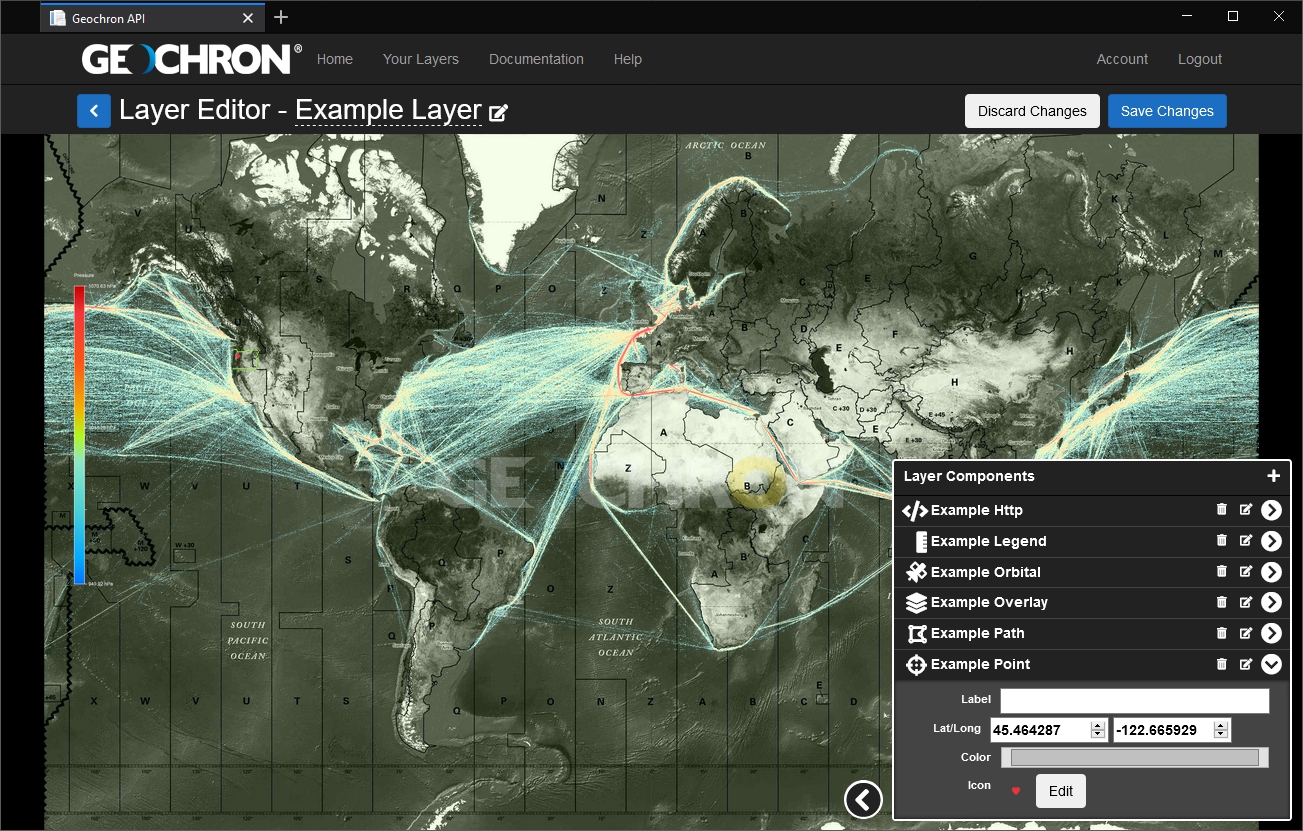
If the component list is in the way of your layer preview, click the circular arrow button hovering near the component list to move it to the other side of the editor.